📤 Share your NFT to another address and wallet.
Overview
If you transfer an NFTs, you hand your collectible ownership to another address or wallet. You can share the NFTs for trading objectives or diversify your digital assets.
Overall Process
The following image briefly describes the whole NFT transfer process.
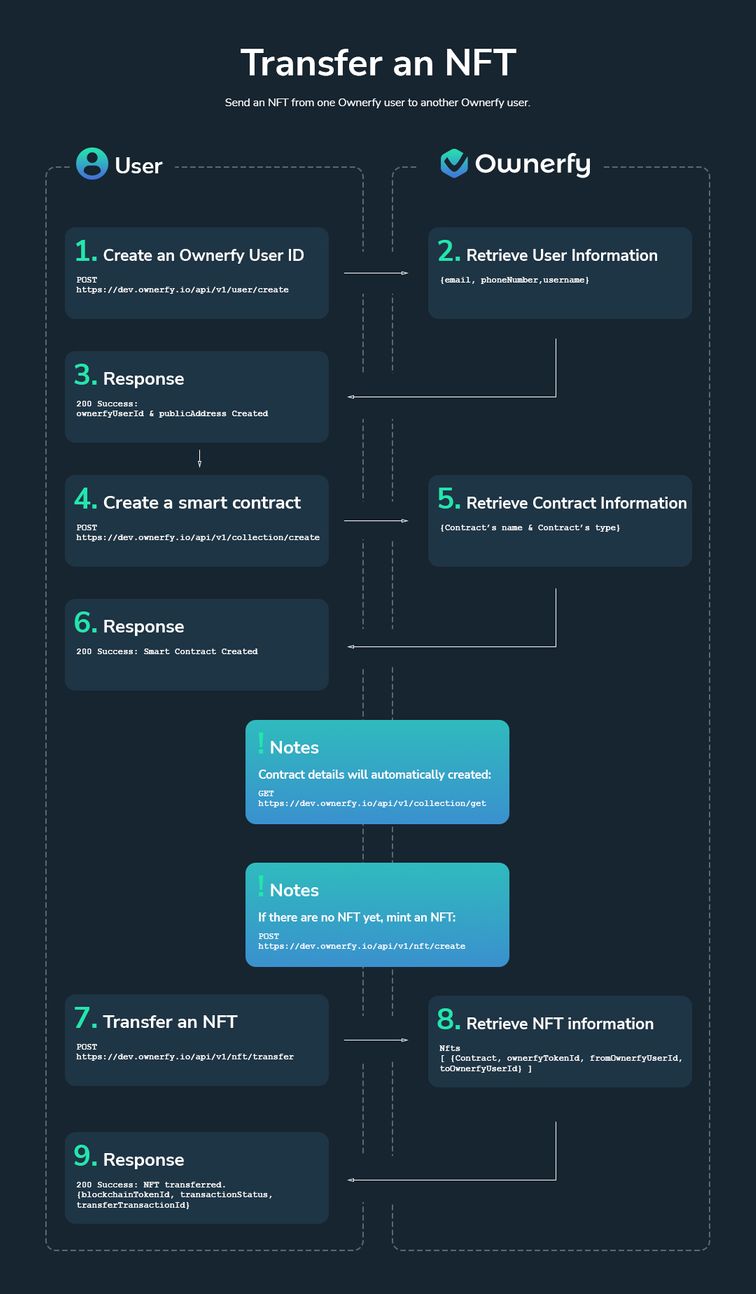
Step 1: Transfer an NFT through an API Call
1.1 Create an Ownerfy User ID
Before transferring an NFTs, you may create a user ID by making an API call using the POST/https://staging.ownerfy.io/api/v1/user/create endpoint.
You need to provide a request as follows:
curl --request POST \
     --url https://staging.ownerfy.io/api/v1/user/create \
     --header 'Accept: application/json' \
     --header 'Content-Type: application/json' \
     --data '
{
     "email": "string",
     "phone_number": "string",
     "username": "string"
}
If it is successful, you will receive the 200 code response with an Ownerfy User ID:
{
  "publicAddress": "0x6984902d0f512445b17cfb76f07d2f53a23d1b68",
  "ownerfyUserId": "SDv1QsnsZbLbDIg82egE"
}
1.2 Create a Smart Contract
Refer to this guide for further details.
Hold on a Sec!
If you don't have any NFT yet, you must mint an NFT first. Follow this guide for details.
1.3 Transfer an NFT
Transfer an NFTs by calling the API POST/https://dev.ownerfy.io/api/v1/nft/transfer endpoint.
Your request body must include the parameters as defined below.
| Parameters | Description |
|---|---|
contract | The parameter means the contract address of the NFT owner who will transfer their collectible to an external address or wallet. |
ownerfyTokenId | The parameter represents the specific identifier of the transferred token or collectible. |
fromOwnerfyUserId | The parameter represents the owner who transferred the NFT. |
toOwnerfyUserId | The parameter represents the recipient of a transferred NFT. |
You need to provide a request as follows:
curl --request POST \
     --url https://dev.ownerfy.io/api/v1/nft/transfer \
     --header 'Accept: application/json' \
     --header 'Content-Type: application/json' \
     --data '
{
     "contract": "string",
     "ownerfyTokenId": "string",
     "fromOwnerfyUserId": "string",
     "toOwnerfyUserId": "string"
}
1.4 It is Completed! ✅
If the result is successful, the response will return as a JSON body as seen in the following code sample.
[
  {
    "blockchainTokenId": your_token_id,
    "contract": "recipient_contract_address",
    "transactionStatus": "transaction_status",
    "transferTransactionId": "your_transfer_id"
  }
]
Step 2: Transfer an NFTs through NFT Wizard
Follow the upcoming instruction to get your NFT transfer done.
2.1 Login to your Ownerfy account
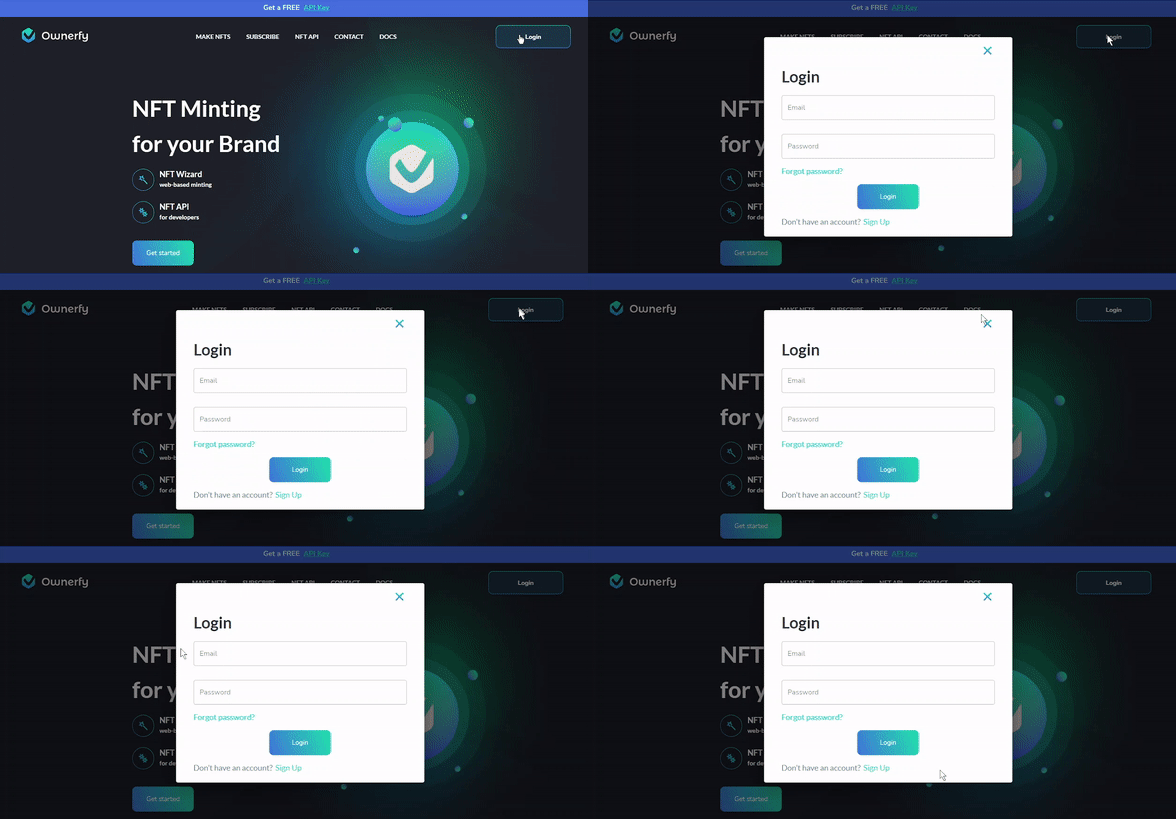
- Click the Login button. Then, a login pop-up box will appear.
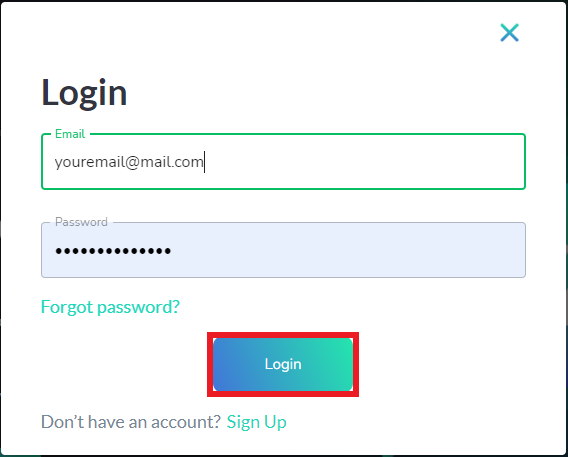
- Insert your email address and Ownerfy password correctly. After that, hit the Login button.
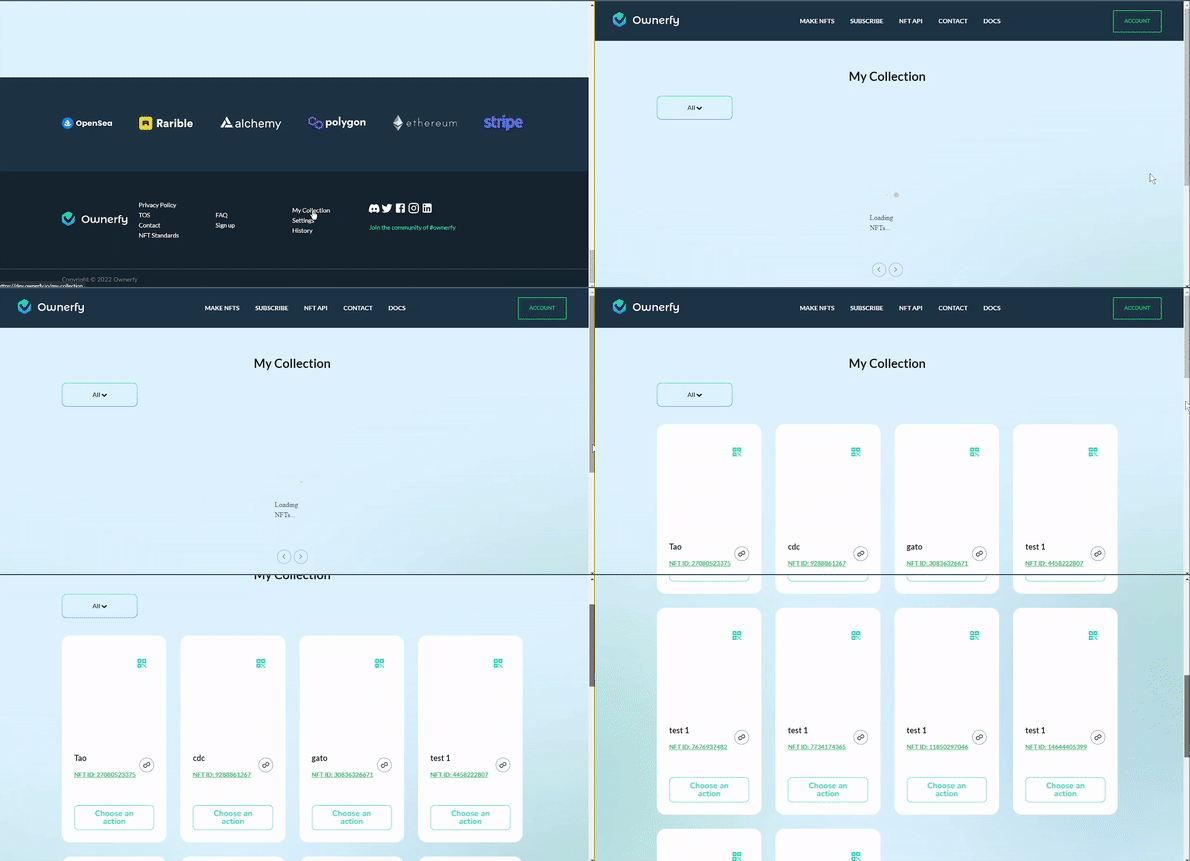
2.2 Open "My Collection" menu
- Select the Account button, you will find the My Collection option.
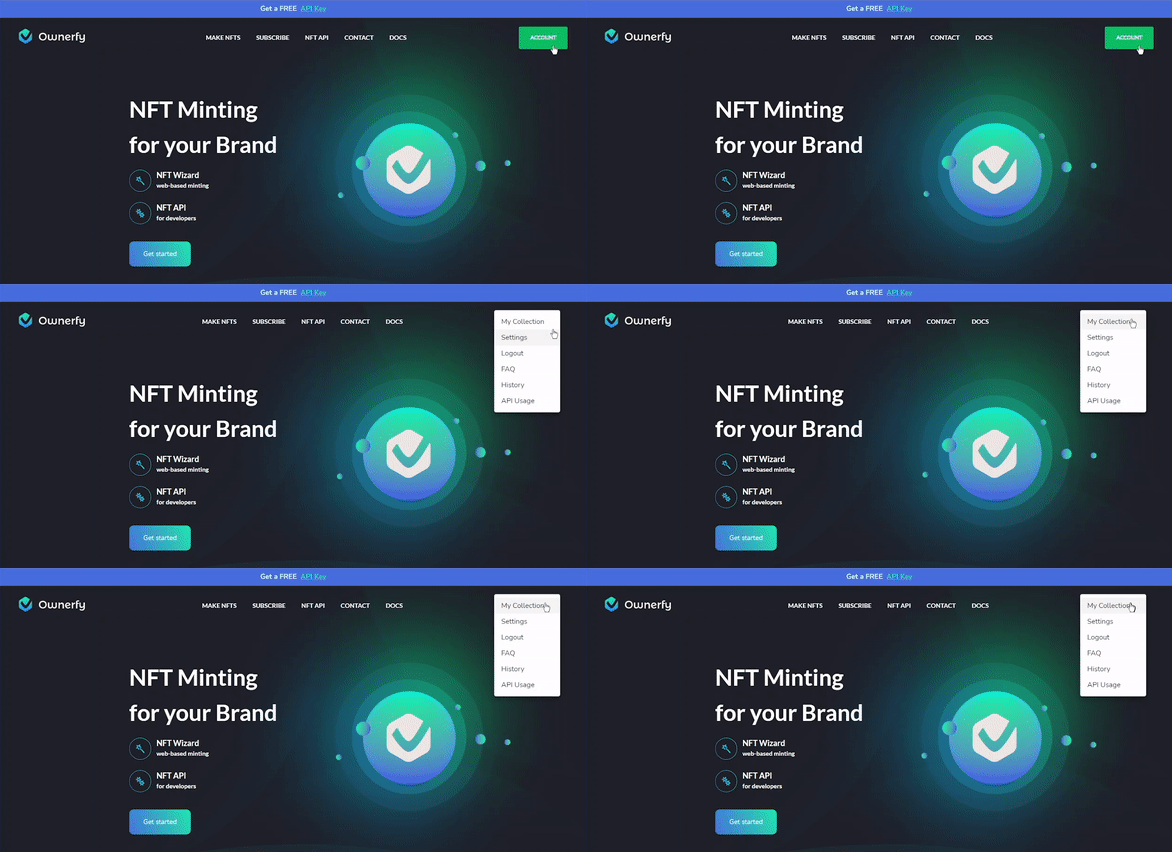
- You will be redirected to a page that displays all of your NFTs.
2.3 Transfer an NFTs
- Click on the NFT that you want to transfer > Click on the Choose an action button > Select Transfer, then you will get a pop-up box.
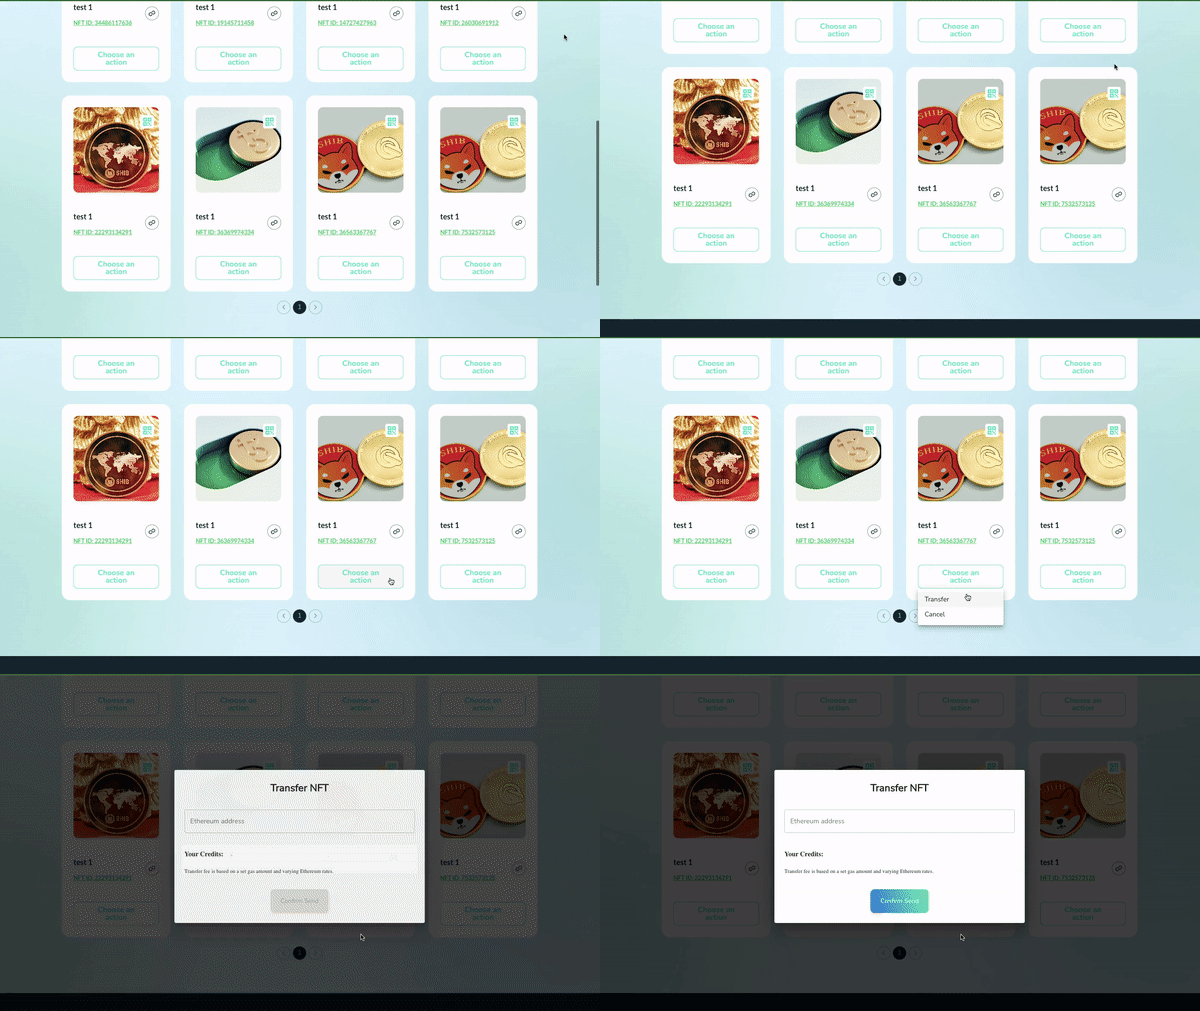
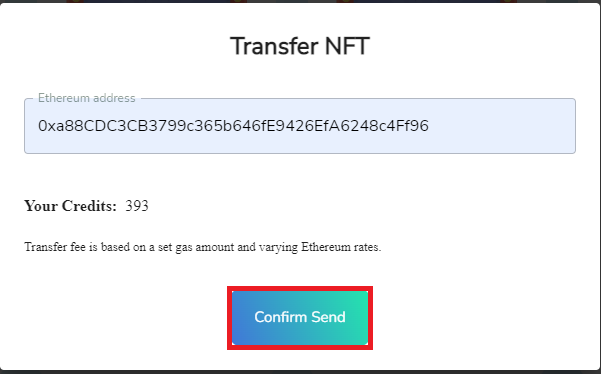
- Fill in the Ethereum address of the recipient > Click on the Confirm Send button.
Attention!
Check the number of credits you have. You must purchase an API plan if you are running out of credits.
